Hardwood Flooring Buying Guide

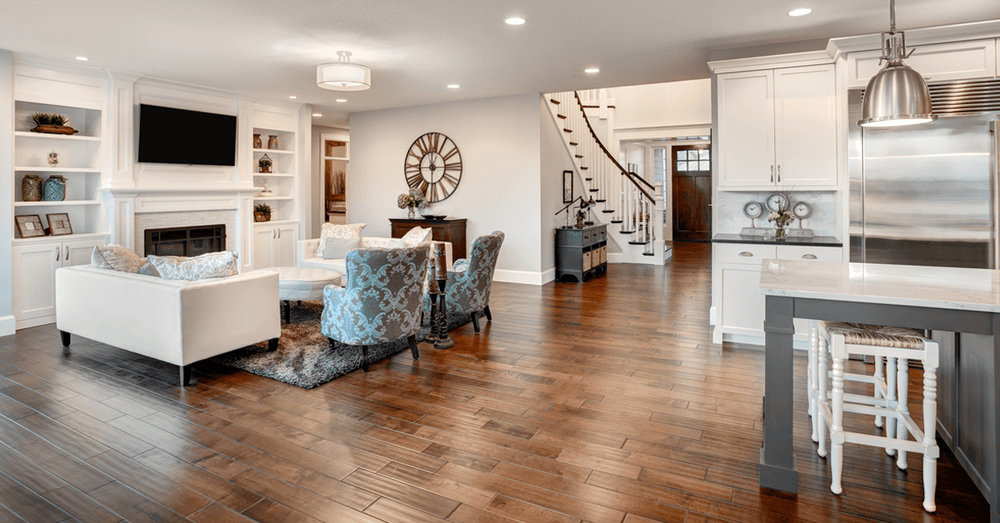
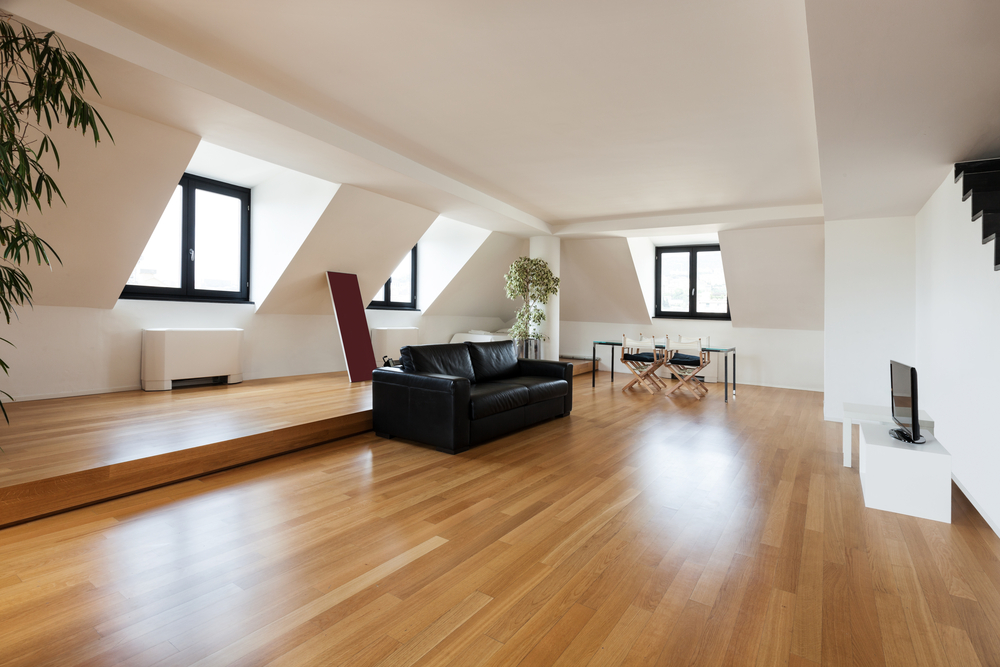
Hardwood floors are an investment in your home that will last for decades and bring warmth and beauty to any décor. Hardwood buying guide helps to make the right interior design choices that will actually raise the value of your home, wood makes a timeless statement of impeccable taste and elegant style.
The guide will help in deciding whether to install hardwood, there are several things important to consider, including the type of wood suitable for your geographical location and the amount of traffic it will be required to handle. Our hardwood buying guide is a summary of all of the knowledge you need to make the right flooring choice.
Things to Consider When Buying Hardwood
When deciding whether to install hardwood, there are several things important to consider, including the type of wood suitable for your geographical location and the amount of traffic it will be required to handle. Our hardwood buying guide is a summary of all of the knowledge you need to make the right flooring choice.
So Many Choices
There are dozens of hardwood choices on the market today, each with its own advantages and disadvantages. You may have already envisioned the color range that fits your style, but color is only the beginning. You also need to consider the following:
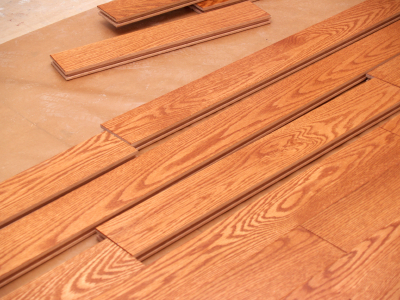
When we consider wood flooring, we generally picture pieces of real wood fitted together, the most traditional type of flooring available. Solid wood flooring is widely available with options in type of wood, grade, thickness and finish.
Solid Wood Flooring, ¾ Inch Thick
While this is the most traditional type of hardwood flooring and certainly the most durable, it is not always the most practical. The main advantage to thick solid hardwood flooring is potential centuries of wear. Some wood floors have survived over a hundred years…and some hundred-year-old woods have been pulled from old installations, re-milled, and recycled into new wood flooring. Yes, they are that durable. You can re-sand and refinish hardwood many times over the life of the floor. While you can expect color changes within the wood over time, this usually serves to enhance the beauty, depth, and character.
The disadvantages to a solid wood floor are also obvious. Thick solid woods are especially vulnerable to moisture and most likely to warp and buckle in a wet climate or with improper installation. You should never install a thick solid wood floor directly over concrete; a wood subfloor is a must. Thick solid woods are also not recommended for subtropical, humid regions, unless the wood you choose is impervious to moisture, like woods traditionally chosen for ship building or those native to subtropical regions.
Solid wood flooring, 5/16, 3/8 or 1/2 inch thick
Thinner profile wood flooring offers a bit more versatility over thicker boards, but won’t wear as well or feel as solid. It is a little less vulnerable to moisture and you can install it in more humid locations. Installation is still not recommended directly over concrete, below grade (ground level or sea level), or in areas where it may become saturated with standing water like bathrooms.
Engineered Woods
Engineered woods are more stable due to their construction, a veneer glued over layered core, similar in construction to plywood with a hardwood top layer known as the wear layer. They are more dimensionally stable than solid wood, meaning they are less vulnerable to moisture, and can be used below grade, directly over concrete, and in any humidity. The hard factory finish assures a long lifespan of 30-60 years depending on quality. In addition, you can print or stain engineered woods to make a less expensive wood resemble a more exotic (and more expensive) choice.
Grades of Wood
You should know that not all woods and manufacturers use this grading system. These are common, general terms, but may not apply to certain kinds of wood – for example Maple. Also, other terms may be in use by wood manufacturers who do not
Prefinished Wood Grades
Clear Grade – The top hardwood flooring grade, indicating very uniform color, no flaws or knots, and longer lengths.
Select & Better – The second best grade, indicating mostly uniform color, no flaws or knots, and longer lengths.
Country or Exclusive Grades – More natural wood character shows in this grade such as variations in color, shorter board average, and small flaws like pinholes and tiny knots are often present.
Traditional, Antique, Character Grades – Planks display a lot of wood character such as variation in color, pinholes and knots, creating a rustic, natural looking floor. Board lengths are usually shorter.
Tavern or Cabin Grade – Planks display a lot of wood such as variation in color, with pinholes and knots very common, creating a rustic, natural looking floor. Board lengths usually average 24″ or less.
Unfinished Wood Grades
Clear Grade – The top hardwood flooring grade, indicating very uniform color, no flaws or knots, and longer lengths.
Select & Better – The second best grade, indicating mostly uniform color, no flaws or knots, and longer lengths.
#1 Common – More natural wood character shows in this grade such as variations in color, shorter board average, and small flaws like pinholes and knots are evident.
#2 Common – Planks display a lot of wood character such as variation in color, pinholes and knots, creating a rustic, natural looking floor. Board lengths are usually shorter.
Shorts – Planks display a lot of wood character such as variation in color, with pinholes and knots very common, creating a rustic, natural looking floor. Board lengths are very short, usually averaging 16″ or less.
Finish
You can prefinished or finish it on-site after it is installed. Prefinished wood flooring has multiple layers of finish applied perfectly even and uniformly. The advantage is a more reliable application resulting in a harder, more durable finish. Site finishing after installation provides a finish more impervious to moisture, without the possibility of cracks between the boards where spills may seep beneath. Site finish is a more expensive installation, and the finished look will be subtly different than that of a prefinished flooring application.
To learn more about hardwood finishes, read our article on The Top Surface Finishes for Hardwood Flooring.
Room Location
You may be planning to floor a bathroom or basement, and those have special considerations. In most cases, you’ll want to choose an engineered wood, and you may want to consider a type of wood common to shipbuilding, like white oak or teak. For installation in a room bathed in sunlight, you may want to consider color change before purchase. Some woods change dramatically when exposed to sunlight, and if you choose a wood for its color, you may be disappointed over time.
Durability
In most cases, traffic in a home is light and doesn’t require special consideration, but some issues may arise when it comes to children and pets or heavily trafficked areas. The durability of the wood – how much traffic it can withstand – is determined by hardness factor, measured on the Janka Scale. Also, by its dimensional stability, which determines how much a wood floor will shift, swell, and contract due to environmental factors such as moisture and changes in weather.
The hardness factor has a wide range of measurements, but it is important to note that harder is better in one respect, not so much in another. Exceptionally hard woods tend to be harder on the legs and feet, produce more impact sounds, and scratch more easily, but wear longer and are less likely to dent. Hardwoods that fall in the middle of the scale will dent more easily, but are warmer, produce less footfall sound, and are easier on the legs and feet. Soft hardwoods may dent very easily, but are easiest on the feet and legs, and often more resistant to ordinary scratch-producers like sand and grit. Some very hard woods have low dimensional stability, and some softer woods have high dimensional stability, which should be considered as well.
Sound
In multi-story installations, including apartments, sound transmission can become an issue. Don’t worry; we have the answer. You can address sound issues by adding underlayment, by assuring that the subfloor is sound, even and flat, and by repairing the joists before installation, or by floating the floor. Type of wood also affects the sound transmission. In general terms: the harder the wood, the louder the sound.
Radiant Heating
Some woods will do fine when installed over radiant heating; others will not. A general rule of thumb is to never install a wood floor over a radiant heating system with a maximum temperature that exceeds 85° F.
Types of Wood
Even within types of wood, you may find variations. With today’s range of finishes, common woods are often dyed or printed to resemble more exotic woods. This means you can often get an expensive look at a fraction of the cost. Here are some of the most common flooring woods used in flooring with a brief description of their natural appearance.
Alder
A popular choice for “shabby chic” décor, alder is a light brown wood with a yellow or pink tinge. It is one of the softer hardwoods.
Ash, White
White ash is very light in color and resembles a pale oak with a distinctive grain pattern and above average hardness.
Beech
Beech has a lot of color variation, reddish brown to creamy white, with distinctive streaks and whorls throughout the wood and a medium hardness factor.
Birch
Birch (most commonly yellow birch) is cream or light brown to medium reddish brown with noticeable but not dramatic color. It has a below average hardness rating and is one of the softer woods.
Bubinga
Bubinga is an exotic wood with a deep, rich reddish color variegated with darker streaks and grain patterns. It is one of the hardest and most durable woods on the market.
Cherry, American (aka Black)
Cherry is a light to medium reddish –brown with a tight, often wavy grain and a satiny, lustrous finish. It is one of the softest hardwoods; however, it has good dimensional stability.
Cherry, Brazilian (aka Jatoba)
Brazilian cherry is one of the hardest woods, ranging in color from medium hued reddish wood with darker streaks.
Cypress, Australian
Australian Cypress is similar to pine, a honey gold to light cream with wavy dark brown streaks and knots, ideal for creating a rustic look.
Hickory
Hickory is medium tan or light reddish brown to creamy white, very similar to pecan. It’s well above average in hardness.
Kempas
Kempas has dramatic color ranging from orange red to reddish brown without much contrast or grain definition, above average hardness rating, but low dimensional stability.
Mahogany, Asian (aka Keruing)
Keruing is a general name assigned to wood from many different species of trees whose wood is nearly indistinguishable. Color varies from pinkish-brown to dark brown without significant contrast. This wood is among the hardest of woods.
Mahogany, Santos
Santos Mahogany is a rich dark reddish brown with darker striations and is exceptionally hard.
Maple, Hard (aka Sugar)
Hard Maple is creamy white to light reddish brown with an above average hardness rating and distinctive grain patterning.
Merbau
Merbau is a rich, lustrous brown or dark reddish brown color that is sometimes sprinkled with flecks of pale gold. It is exceptionally hard and durable.
Mesquite
Mesquite is light brown to dark reddish brown with distinctive patterning from ingrown mineral streaks and is exceptionally hard.
Oak, Red
Red Oak is light in color, reddish in tone and of medium hardness.
Oak, White
White oak heartwood is pale brown in color and may have a pinkish or slightly silver/gray cast with a medium hardness rating.
Padauk
Padauk is a dark, rich reddish or purplish brown or black with little variation in color and a high hardness rating.
Pecan
Pecan wood ranges in color from the reddish brown with dark brown streaks to the creamy pinkish white. It has an above average hardness rating.
Pine (aka Southern Yellow)
Southern Yellow Pine is light yellow to yellowish brown and can have an orange cast with distinctive grain patterns featuring knots and whorls. It is a very soft wood.
Pine, Heart
The term heart pine usually describes wood reclaimed and recycled from old buildings. Its color is warm reddish brown with pale yellow sapwood and some black sap staining. It falls just under the median hardness rating.
Sapele
Sapele is an exotic hardwood with a dark, rich, reddish brown color and a hardness rating well above average.
Teak, Brazilian (aka Cumaru)
Brazilian teak is one of the hardest wood species in the world. It is a fairly uniform light to medium brown and may have a yellow cast.
Teak, True
True teak is medium golden brown with streaks of darker brown. It is one of the softer hardwoods.
Tigerwood
Tigerwood ranges in color from a pale cream to a rich reddish-orange hue with a dramatic streaking pattern. It is well above average in hardness and dimensional stability.
Walnut, American Black
American black walnut is rich dark brown to black with a purple cast. The sapwood is dramatically lighter, but flooring manufacturers usually bleed the color from heartwood to sapwood to minimize difference. It is a softer than average wood.
Walnut, Brazilian (aka Ipe)
Brazilian walnut is a medium to very dark brownish black with little variation and is one of the hardest of woods.
Wenge
Wenge is a rich dark brown wood with thick striping in almost black and high contrast to pale yellowish sapwood. It falls well above average on the hardness scale.
Sustainablity
We’re all worried about the environment today, and concerns about the rainforest are at the forefront of environmental concerns. Most of the issues surrounding deforestation center on illegal logging and irresponsible lack of reforesting. Today, these concerns have led to new regulations and laws. Due to sheer longevity, sustainability, cost-effectiveness, and practicality are inherent values of a hardwood floor. To ensure that you are buying flooring that meets environmental standards, ask the dealer for documentation of compliance with the Lacey Act, or buy flooring harvested and manufactured in the United States or Europe, where no illegal logging currently exists.
Cost Considerations
Once you’ve chosen a hardwood floor, you need to calculate the total cost of your installation. You will need to determine of how much square footage you’ll need plus 10% for waste, along with the cost of underlay, moldings, and trim.
Apart from material costs, here is a list of additional expenditures you may have to factor in during or prior of a wood flooring installation project:
- Furniture removal and replacement: Some professional installers charge to remove your furniture and for moving it back once the installation is complete.
- Removing old floor covering: Your previous/old floor covering may need to be removed and disposed of. Some installers charge extra, so to save money, consider doing it yourself.
- Subfloor preparation: If your subfloor needs to be repaired or treated for unevenness, then pre-installation work may incur additional charges. Be sure to ask your installer to review your substrate.
- Installation: be sure your flooring calculations include the cost of materials and all installation costs.
- Accessories installation: If the installation procedure requires accessories/additional material/tools to install wood properly, be sure to find out if this step is included in the installation agreement.
Before You Begin
Hire a Professional or DIY?
The answer to this question depends on several factors, not the least of which is your experience with a saw. End pieces and floor sections that intersect and have to fit around things attached to the floor – pipes, cabinets, or built in bookcases, for example – will need to be sawn to exact specifications. If you don’t feel confident to measure and saw accurately, you may be better off hiring a professional or finding a friend with more experience to lend a hand.
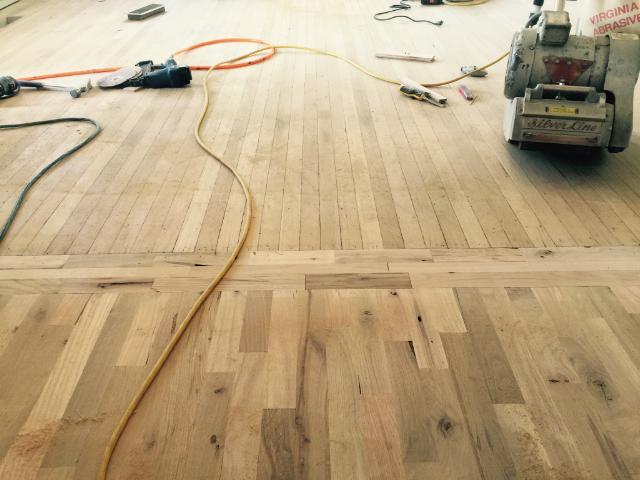
Many engineered flooring styles have click-lock installations that require no glue or nails and little experience. Installation is fast and easy, even for a beginner. Solid woods offer more of a challenge. They must be nailed, glued, or stapled, and require more experience and a little more finesse. Another consideration is whether you’ve chosen prefinished or unfinished wood. Unfinished wood requires multiple sanding and finish cycles using a powerful drum sander. Improper sanding can ruin the floor. Unless you have experience with a drum sander, we do not recommend you try this on your own.
If you decide to do it yourself, here’s what you need to know:
Subfloors
There are different types of subfloor, but before installing wood flooring over any type, you must ensure that the subfloor is flat and even. Here are some basic tips for each type of subfloor:
Concrete Subfloors
- If this is a new home, the concrete slab should be allowed to cure for at least 6-12 weeks before wood flooring is installed.
- Using a moisture meter, make sure that the moisture content of the concrete meets the flooring manufacturer recommendations.
- Even if the moisture content is low, consider using an underlayment with a moisture barrier if installing directly onto concrete.
Wood Subfloors and Joists
- Wood subfloors are often installed over concrete slabs on the ground floor, so perform the same moisture test to be sure the subfloor is suitable for wood installation.
- Test the floor for squeaks and weak spots. Some repairs can be made by simply nailing down corners or tightening screws, but you may need to replace wood over mushy spots and possibly even level the concrete beneath.
- Look for anything that protrudes – staples, nail, or screw heads and corners that aren’t level are common.
Upper Level Floors
- If installing on an upper level, check the joists. Make sure they are tightly anchored. Shifting joists cause squeaks.
- Consider a floating installation with padding under the floor to dampen sound transmission.
Basements and Bathrooms
- Have the wood, including the matching moldings, delivered to the room where the floor will be installed. Allow it to sit flat and unwrapped for several days prior to installation. This allows the wood to adjust to the ambient humidity in the room.
- Don’t install on days when the forecast calls for rain, or during a week when it has been exceptionally rainy. The moisture content in the air can cause the wood to swell too much, and can result in gaps when the air returns to normal humidity levels. The goal is to install when the air is at its most normal humidity level, leaving space at the edges for normal expansion.
Acclimatization
- Have the wood, including the matching moldings, delivered to the room where the floor will be installed. Allow it to sit flat and unwrapped for several days prior to installation. This allows the wood to adjust to the ambient humidity in the room.
- Don’t install on days when the forecast calls for rain, or during a week when it has been exceptionally rainy. The moisture content in the air can cause the wood to swell too much, and can result in gaps when the air returns to normal humidity levels. The goal is to install when the air is at its most normal humidity level, leaving space at the edges for normal expansion.
Pattern and Grain
Most woods have some variation in color, and installing them out willy-nilly can result in a strange arrangement of dark and light patches. Before you begin permanent installation of the floor, lay out the boards and arrange them in a design that suits your taste. There’s no right or wrong pattern, and most people arrange the color variations randomly so that the color is evenly spaced. However, choosing boards that most closely match the baseboards and trim along the walls will result in a more harmonious overall look.
In addition, you may want to consider direction. The most traditional installation begins along the longest wall (usually the outside wall). Diagonal positioning is also possible, but trickier to install.
Accessories
Installing a wood floor doesn’t end at choosing the right wood. You’ll also need the right underlayment, moisture barrier, moldings and trim to finish the project. Make sure your dealer has products that complement the wood you’ve chosen.
Moldings and Trim
- Base shoe molding – A combination of the baseboard and quarter round; a flat profile, with a rounded lip at the bottom of the molding. This molding is used when shallower profiles are required – behind bookshelves, for instance.
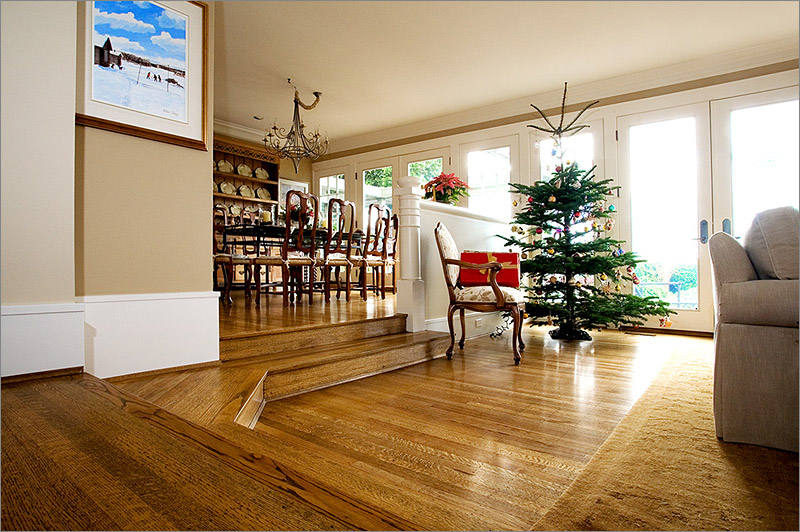
- End molding – A transition molding used when level differences between two rooms are even greater, or when looking to find a transition between a wood floor and a sliding glass door, for instance.
- Reducer molding – A transition molding placed flat on a floor between two rooms that have slight level differences – between wood flooring and tile, for example.
- T molding – A transition molding used between two rooms of the same level. This type of molding is shaped like a “T” when looked at in a cross-section.
- Stair Nose molding – For use when making a transition between a wood floor and stairs. The molding hooks over the edge of the first stair, with one edge on the surface of the flooring, and the other on the vertical face of the stair.
- Quarter round molding – Used in the same way as a base shoe molding, behind cabinets where a low profile molding is better suited to support an object flush against the wall.
- Baseboards – A very commonly known molding with a flat vertical surface or “profile,” used in the same way as a quarter round; a transition between floor and wall.
Underlayment
Underlayment is a material placed between the sub-floor and the wood floor to provide cushioning, sound absorption and a barrier to moisture. It comes in large rolls or as separate pieces that can be taped together. The use of an underlayment speeds installation, reduces walking noise, improves flooring stability, and provides superior support.
- Remove the shoe molding from around the baseboard and also the doors from the installation area to be covered.
- The flooring planks need additional space to fit under doorframes. Place a piece of underlayment and laminate flooring next to the jamb to determine the required height, and cut out the desired area of the frame.
- Install the underlayment and make sure the edges don’t overlap. To prevent them from shifting, tape the pieces together. Create an expansion gap between the underlayment and walls by using spacers.
- If you’re installing a wood floor over a concrete slab, apply a vapor barrier before installing the underlayment.
Installation
All wood flooring commercially available today has a tongue and groove construction for a precise fit. Engineered wood flooring may be glueless and fit together by clicking into place, or may require glue or staples to aid installation.
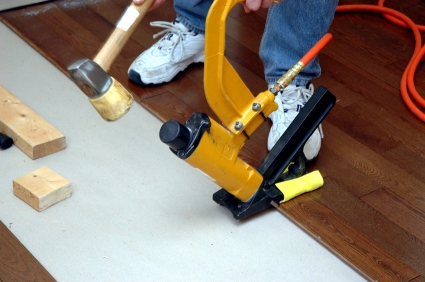
Solid wood flooring requires glue, staples, or nails for installation. Some wood choices may only be installed by one method or the other, for example, nailing is usually the preferred method for most thick solid woods, but may cause edge splintering for some of the thinner solids, making another method preferable. The manufacturer will provide information about the preferred method of installation for the specific type of flooring you’ve chosen.
All wood flooring types require expansion room around the edges of the floor. Spacers are available to help keep this expansion room even around the room. Trim is designed to cover the gaps left by the expansion room.
Installation Tips
- Start the installation from the left corner of the room. Cut off the tongue of the planks, and run them parallel to the wall with the help of expansion spacers.
- Install each plank by inserting one end into the other at an angle and pressing down.
- On reaching the end of the row, measure and trim the last plank to fit.
- Cut a new plank similar to the pattern of the first row and start the next row with this plank.
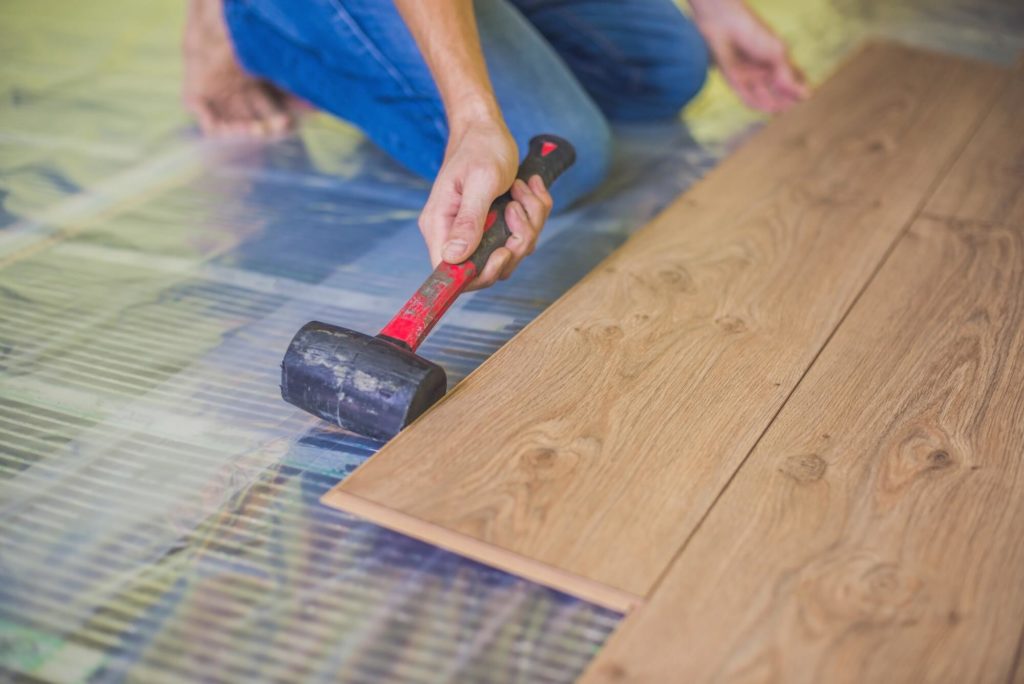
- Lift the previous row slightly to fit the next planks into position. Now give a sharp rap to the next line of boards with your hand to fully engage and press them down firmly.
- Continue with this procedure with the rest of the flooring.
- The last row should be the same width as the first row. Trace the wall outline and remember to leave space for expansion.
- Trim and remove excess plastic sheeting and spacers. Reinstall baseboards without nailing to the floor.
- Flooring should extend under the doorframe. Use a piece of scrap flooring to mark the depth that the doorframe should be trimmed.
After Installation
Once you’ve installed your beautiful new hardwood floor, you’ll need to know how to maintain it. We’ve put together extensive resources for maintenance, cleaning, repair, refinishing and restoring your floor to its original showroom beauty.
Care and Maintenance
You’ll be happy to know that wood floors are easy to care for and maintain. The most important things you can do to maintain the beauty of wood floors is sweep or vacuum and keep them dry – mop up wet spills immediately. Other than that, an occasional damp mopping with a simple vinegar and water solution or with a commercial product made specifically for your type of wood (check with the manufacturer) is all that’s needed.
Common Repairs
Any hard surface flooring can become scratched, chipped or dented over time. There are a number of repairs you can do without bringing in a professional.
Scratches
Many surface scratches only affect the finish and can be repaired by lightly buffing with steel wool followed application of mineral spirits. Deeper scratches can be repaired with a light sanding followed by application of wood filler in a color that closely matches the floor. Serious gouges may require overfilling, sanding and re-staining of the plank to match the rest of the floor. Always sand with the grain, and vacuum between sandings to remove any grit. You may also want to consider a wood repair kit with fillers and markers available in popular wood colors.
Dents
Softer wood floors may dent from impact or weight. To repair a dent where the wood has not cracked or broken, first try a method of steam to raise the indented area. Place a damp towel in the dent or steam it using a hot iron (or alternate both methods). If it works, you may have to sand the spot to make it level. If the dent is too deep, to fill the dent with an epoxy, wood inlay, or lacquer lay-in, or as a last resort, replace the board.
Gaps
Over time, gaps may appear between the boards in your floor. Depending on the size of the gaps, you may use wood filler or putty, following with stain to match the floor. For wider gaps, you may choose to use wedges of wood, called shims, which can be inserted into the cracks and then sanded and stained to match. Extensive gaps are usually a result of poor installation or of installation in an area too humid for the wood.
Refinishing
One of the most common questions people ask is whether their wood floor can be refinished if it becomes damaged or dull over time. The answer depends on the type of floor you have. Solid wood and most high-end engineered floors can be sanded and restored to the original beauty with the number of times depending on thickness of the wear layer. The average is 5 – 7 times over the life of the floor.
Less expensive engineered floors have a thin veneer that cannot be sanded, but they can be screened to remove layers of varnish that have dulled and re-varnished to restore the luster if the finish becomes cloudy or marred.

Fitz
Hello,
Thank you very much for having taken the time to create this hard wood floor buying guide. For first time hard wood floor buyers, it can be a process that provokes a lot of questions, and it’s good to know what thing to pay attention to when researching the right flooring and company to go with.
I have always thought for these types of things, it is important to do the right research to make sure the products and decisions are correct for the situations. Hard wood floor, and flooring in general is a long term decision that will hopefully bring satisfactory for a long time in the future.
Fitz
Ed Taylor
Can I apply a locking wood floor over an existing 3/8 in finished oak floor?
Floor Shoppers
Hello, Looking at getting 3/8″ Red Oak flooring for the 2nd floor of a house that had sub flooring damage and was then fixed/replaced after the 1994 North-ridge Earth Quake in California. Should I use 2 1/4″, 4″ or 5″ tiles as i am concerned about warping. Not much moisture as this is a semi-arid area. Any advice would be greatly appreciated. Purchasing from online store and hiring local professional to install.
Rhiannon Gelston
What would you recommend between quarter sawn oak or brazillian walnut for a lively, busy family with young children and a dog? Or another choice you may recommend? I like walnut too but was told it was very soft.
John Pfeiffer
I am installing a new prefinished hardwood floor in my 30-year old townhouse, which now has wall to wall carpeting on top of plywood.
Must the new flooring be installed perpendicular to the underlying floor joists, which run from the front of the house to the back? This would result in the flooring running across the view of the person entering the house rather than from front to back, which I find aesthetically more pleasing.
What are the pros and cons of running the flooring parallel tot the joists rather than across them?
Thank you.
lee auerbach
Hi: I have a home on Long Island, NY, Town of Islip, Bay Shore.
Would you know a flooring contractor nearby who can install wood flooring with the lowest VOC rating?
Thank you……Lee Auerbach
rUBY bRODBAR
I need some of your expert advice. I have gotten several opinions. Each opinion seems to contradict the prior one. I am confused more than when I started. I recently moved into a 2 story house. The upper level is all hardwood flooring. The first floor is about 820 sq ft of ceramic tile on a concrete slab.
Although all the tile put in mud is in excellent condition, none broken and from what I can see with an 8ft level, the floor appears to be level. I don’t want to use 3/4 inch as it is too high and would resolve
in alot of complications with my baseboard heating system. I would prefer something in 3/8 or maximum
of 1/2 inch. I heard the word engineered flooring used in some of the retailers I visited. Then I recently was informed by a neighbor who just had a new floor installed of a click/lock. Is the engineered floor
better than the click/lock? These are the questions I have. I had 2 so called professionals at my home and that’s where the contradictory answers come into play. The ceramic tile has a shiny surface on it. One installer said it can be installed as a floating floor but I was told of 2 different methods of installation. The first installer said he would have to roughen the floor first, apply a coating of glue over the tile, place underlayment on top of the glue, put another level of glue on top of the underlayment and place the hardwood floor to that glue. The second installer said he would place an underlayment over the ceramic tile, glue the surface of the underlayment and then place the engineered floor into the glue. I would consider a click/lock if it is a better product providing the product is made with a minimum 3 mm wear layer, so in the event it ever has to be sanded, that it can be accomplished without going right thru the product..I might add if possible, I would not like to have adhesive or the ceramic floor roughened in any area questioned so if I decide to remove the wood at any time in the future, I haven’t ruined the ceramic tile. I don’t know much about your compamy and I got your website from a neighbor. Are you a manufacturer or a buying service and what brands do you actually carry? I’d appreciate very much if you would provide me with your expert advice.
Jenkins
What should be done with nail heads that our flush with floor and have been driven in sideways?