You might also like…


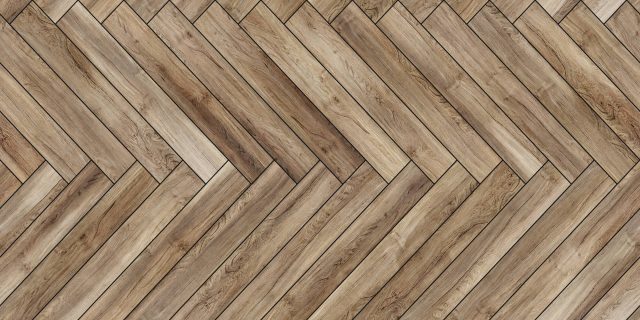
If you’re looking to give your home a luxe aesthetic, herringbone is a fabulous choice. This angular design derives from the way the bones of a fish, such as a herring, look and has been used in home design for decades. From kitchen backsplashes to bathroom walls, herringbone has long been used as a favorite pattern with tile. If you adore this specific design but want to do something unique, try a herringbone wood wall that blends a bit of rustic together with high-end style. The pattern was once reserved for floors only, but today you’ll find it on walls ranging from modern condos to rustic country farmhouses.
Using Wood in a Herringbone Pattern
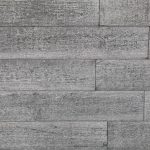
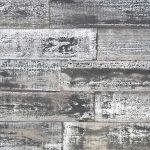
Smart Wall Paneling 3D Barn Wood Gray Reclaimed DIY Smart Wall Planks in Barn Wood / SKU: 15237165
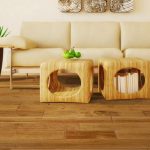
Since the herringbone design looks fantastic on walls, it’s the perfect way to achieve that iconic farmhouse look. You can make your herringbone wood wall look authentic by using either reclaimed wood or rustic-inspired planks of wood material. If you need to find a source for reclaimed wood, BuildDirect sells a variety of wall plank panel options to help you get started and give you some inspiration. This material exudes the rustic warmth of a classic farmhouse and comes in an assortment of colors ranging from trendy gray to inviting brown and more. When you apply it to the walls, it instantly gives any space in your home a rich, inviting look and feel.
Smart Wall Paneling 3D Country Wood Whitewash DIY Smart Wall Planks in Country Wood / SKU: 15237167
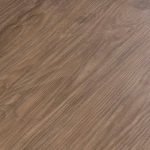
Your herringbone wood wall can be in any colorway you like. Something finished in a gorgeous whitewash color will bring that feeling of true rustic authenticity to your space. If you prefer something richer, install wood plank panels in warm brown tones. These colors can range from light to dark and everything in between. The goal is to create a unique feature wall that makes a bold statement. You can add a herringbone wood wall to the kitchen, living room, master bedroom, and more. This unique accent wall is sure to give your home a show-stopping look.
Creating Your Herringbone Statement Wall: DIY Tips
Before you start your herringbone wood wall project, there are a few tips to keep in mind. These helpful tips will ensure that your final product looks stunning and that it’s done just the way you want it. Read on for some handy information that will inspire you and keep your DIY wall project on track:
- If you’re looking to go green for your herringbone wall, reclaimed wood is the way to go. This material is taken from old buildings and recycled for use in a variety of home projects.
- To keep things interesting, don’t worry about every single plank matching. Instead, enjoy the variations in wood grain and color for an eclectic aesthetic.
- Gather your tools in advance to make the process go smoothly. This will include the wood, finish nails, a nail gun, a level, and a miter saw so you can cut each board to length.
- Lay the herringbone pattern out onto the floor to help serve as a guide. Once you’re ready to install the planks on the walls, this will create an easy layout that will make installation much easier.
- Start applying the wood or wood planks in the center of the room and work your way outward as you head toward the edges of the wall.
- Take your time and measure and level each plank carefully to make sure you get an even, uniform look.
- Don’t forget to mark outlet cover holes so you can cut out an area to add the wall outlet faceplate back after you’ve finished installing the herringbone wood wall.
- Finish the look with some unique wall sconces or artwork to give it an extra touch of personality and your own personal style.
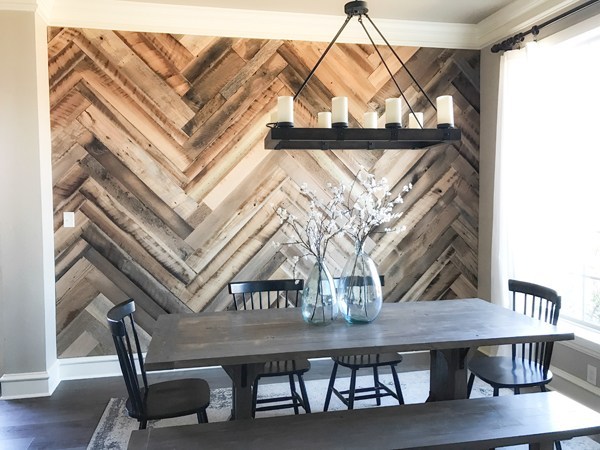
Image via shanty-2-chic.com
Measuring Your Wall and Placing Planks
The key to a herringbone wood wall is making sure that you have the correct measurements for the wall and the planks. Each wood plank should be cut to the same length in order to achieve an even, uniform look. If any planks are cut to a different length, it could make the entire wall look off-kilter. Make sure you decide on a set measurement for the planks ahead of time and then stick to it when you go to cut. This will ensure that your herringbone pattern stays uniform throughout the installation process.
So, how do you know what size or length to cut your wood plank pieces? First, you’ll need to determine what the width of the board is, then multiply it by 0.3536. This simple formula will give you the ideal length of each herringbone piece. If the number comes back as a fraction, simply round it up or down to an even number. Then, you can mark each plank to the length you’ve come up with. Use a pencil to mark each board. Then, using a miter saw, you will need to cut each piece accordingly or use a miter box and a hand saw to cut the wood at uniform lengths at a 45-degree angle.
After you’ve cut and gathered all your wood planks together, it’s time to start placing them on the wall. Find the center of the room and begin nailing each plank to this part of the wall first. Layer each herringbone plank one-by-one from the top of the wall to the bottom. After each vertical row, you can continue the process again working outward until the entire room is complete. Use finishing nails that won’t show after you apply them with a nail gun. These small nails are the perfect choice for wood planks since the planks are thin enough to stick to the walls with a simple tack nail. If you purchased wood planks with a sticky backing, you can use this method instead. Just make sure the wall is clean and dry before application or the herringbone pieces may not adhere correctly.
With some patience and the perfect choice of material, you can add a gorgeous herringbone wood wall as an accent in your home. From a cozy living space to the master bedroom, this rustic-inspired DIY project will really add a “wow” factor to your favorite rooms.


 (7 rating, average rating is 2.43/5)