How to Install a Custom Dance Floor in Your Home
Turn the spare room or your unused garage into a wonderful dance studio by laying down a custom dance floor. If you’re experienced with DIY home improvement projects—and you love to dance—this project should be a cinch. Just follow the (dance) steps below.
Preparing the Subfloor
The best hardwood floor has a good subfloor; without good subfloor installation, your hardwood floor might be uneven, creaky, or gapped. An imperfect hardwood floor is annoying enough for everyday life, but when you’re building a custom dance floor, these defects impact how easy it is to dance on the hardwood. If the hardwood is too flawed, you won’t have a pleasant or easy dancing experience.
When installing a hardwood floor or a floating dance floor (also known as an elevated or a sprung dance floor), your subfloor needs to be plywood or oriented strand board (OSB) atop concrete. Start with your concrete; if the concrete in your existing floor has sustained any damage, you should pour new concrete. The concrete must be extremely dry for you to install anything atop it; moisture in your concrete will wick into your wood and damage the dance floor.
Concrete rarely is perfectly level, so you can use a self-leveling compound to smooth out the imperfections and make laying the plywood or OSB portion of your subfloor easier. You will also want to lay down a moisture barrier layer atop the concrete before you install your plywood sub floor.
Creating the Elevation for a Sprung Dance Floor
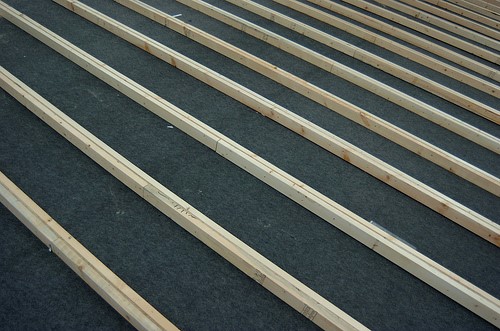
Image via Flickr by SteelCityHobbies
Not every dancer prefers elevated flooring. Sprung dance floors provide more cushion on joints, especially knees and hips, but they are also considerably noisier if you’re doing any kind of hard-shoe dancing. Many dancers report that elevated floors feel bouncier. Keep in mind that a sprung dance floor probably won’t match up with the rest of the floor levels in your home. Whether or not to elevate the floor is up to personal dancing preference.
To create a sprung floor, you need to make a lattice that fits between your concrete and your plywood subfloor layers. Some people prefer to create the lattice structure with boards that run parallel to the four walls of the room, making what looks like a checkerboard pattern. Your other option is to install the boards at a 45 degree angle to the walls. The most important thing to do when creating elevation is to spread your boards evenly and to ensure everything is level. You may have to adjust the height of your lattice in certain areas to ensure the flooring installed atop it is level.
Your lattice plan should involve 12 inches between each board. When you’re measuring, make sure to take into account the width of the boards. It’s easiest to put down tape or use chalk to mark out where each board needs to go before doing any work. For your lattice, spruce 2”x4” boards are a good choice. They’re sturdy but inexpensive.
Cut the boards so that they fit your lattice measurements. If you have to connect two to reach a certain length, that’s no problem. Just make sure that the seam between boards is 20 inches or more away from the seam in the adjacent rows. Use Ramset fasteners to attach the sprung floor lattice directly to the concrete below it.
A Floor Without Elevation
A layer of plywood between concrete and hardwood isn’t enough for a good dance floor if you decide not to use an elevated model. In this instance, you want to create another layer beneath the plywood to still give the floor some spring. Pine is a popular choice for creating a middle layer of subfloor. Large slabs of pine (1/2 inch to 3/4 inch thick and four feet wide) laid at 45 degree angles and attached directly to the concrete will add comfort and sturdiness to your dance floor. You can also lay down a foam layer.
The Plywood Subfloor Layer
After creating your elevation, your next layer of subfloor is the plywood or OSB layer. Before you start installing this final subfloor layer, make sure your lattice is completely level. You may need to add to or shave the 2×4 boards to get a level surface. Also ensure that the nails in the boards are flush.
Make sure you get plywood sturdy enough to be a subfloor. CBX plywood thicker than 7/16″ is appropriate for joists spaced up to 16 inches apart. You can use a nail gun to install your plywood layer, as long as the nails aren’t going straight through the joists and hitting the concrete. While you’re laying the plywood, you can use glue to ensure the plywood is flush together and sticks in place.
Installing the Final Dance Floor Surface
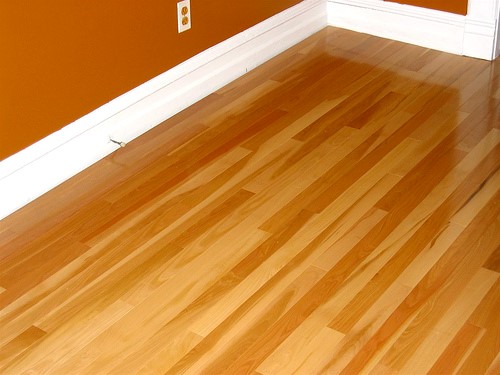
Image via Flickr by Ross Catrow
You’ve finished the subfloor, and now you’re ready to install the dance floor itself! Laminate is an adequate substitute for hardwood, but serious dancers always prefer real wood, so if you can swing it, go for hardwood instead of an imitation. Whether you use long boards or square pieces is up to you; the most important aspect of your hardwood dance floor is ensuring that the seams are almost invisible so that dancers cannot feel them while moving around the dance floor.
For your dance floor, you don’t want the kind of hardwood boards you have to nail down. The interlocking type (even if you use glue where the boards meet) is what you should use. Oak is a popular choice for the final layer of many dance floors. While laying this final layer of flooring, leave a small gap between the boards and the walls to ensure an adequate amount of give in the floor. Your baseboards will cover this gap, so you don’t need to worry about how it looks. You can go as large as 2 inches, but between 1/2 and 3/4 of an inch will be adequate.
While installing your dance floor, remember that you can customize and adapt any of the steps to create the dance floor that suits you best. Happy dancing!
Let us know what you think! Share your dance floor installation ideas, or just your favorite dance moves, in the comments section below.
Scott Huang
hello,
thank you for this article, it was very helpful for understanding what would be involved in building a sprung dance floor. My question is how would these instructions differ if the room were an unfinished concrete basement floor? I’m assuming hardwood for the dance floor surface is not an option. Do I need a moisture barrier between the concrete floor and the lattice layer below the plywood?
thanks for your help!
scott
stephen merkent
How does temperature effect this material. I was thinking in terms of an RV which is stored out side??
BuildDirect Product Expert Team
Hi Stephen,
Thank you for your inquiry! Any wood floor is affected by temperature and humidity and would need to be in a temperature controlled area for it to stay stable. You may want to consider a vinyl plank option, I’ve included a link below of what we carry. These products do expand and contract if there are large swings in temperature but they are more stable than natural wood products. Please let us know if you have any other questions!
https://www.builddirect.com/Luxury-Vinyl-Tile.aspx