Wood Flooring Issues: Delamination
As gorgeous as hardwood floors are, they’re also expensive, which is why many homeowners opt to install laminated wood flooring instead. Engineered flooring so closely resembles genuine solid wood that it’s practically impossible to tell them apart. Plus, it’s much less expensive. However, that doesn’t mean you can throw it down and simply forget about it. Engineered hardwood has its own set of unique maintenance requirements and potential damages, beginning with the threat of delamination.
What is Delamination?
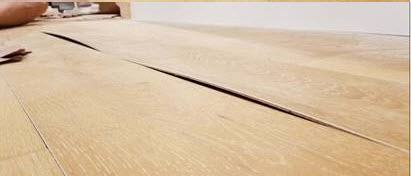
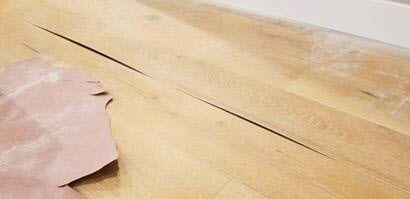
Delamination is a flooring defect unique to floor boards made of composite material like laminate and engineered. You’ll know delamination when you see it because the flooring top layer begins to separate from the core. The floorboards might bubble or hump in the middle, or the top part might peel back from the edges. It’s also a problem you might notice in other laminate items, such as cabinets and dressers, but here we’re going to focus on flooring delamination.
What Causes Delamination?
Moisture damage is the primary culprit. The layers that compose engineered wood are typically held together with glue. Intense pressure ensures its longevity and improves its ability to hold its shape, but once water penetrates the layers, the pressure releases and the layers begin to separate.
How to Avoid Repeat Delamination
The best way to prevent delamination in your floors, is to try to pinpoint the cause before you repair it to ensure you don’t have to deal with a repeat of the issue later. As you might expect, that means you have to choose your cleaning products carefully. Homeowners who clean their solid hardwood with a natural mixture of water and vinegar assume they can do the same with laminate flooring, but that’s a mistake with potential for damage. Vinegar is acidic. The acid eats away at the veneers of the floorboards and loosens the glue. Although the floors appear to gleam, they’re gradually breaking down, especially if you use a damp mop that leaves behind moisture. Swiffer machines and floor steamers are too wet for engineered and laminate floors, too.
Traditional hardwood floor cleaners aren’t automatically appropriate for laminate. Always read the label to ensure a product is actually recommended for use on engineered wood. Otherwise, use a soft broom and a vacuum. Spot-clean spills or pet accidents and wipe up the cleaner thoroughly, so it doesn’t soak into the floorboards.
You might think that you’re improving the appearance of your floors with the application of a floor polish. However, those aren’t made with engineer hardwood in mind. Rather than resulting in a rich, gleaming finish, the application may cause the oils to damage the laminate. Ammonia is another substance to avoid at all costs. In addition to delamination, it results in unsightly discoloration.
How to Fix Delaminated Floors
1. Gather Your Tools
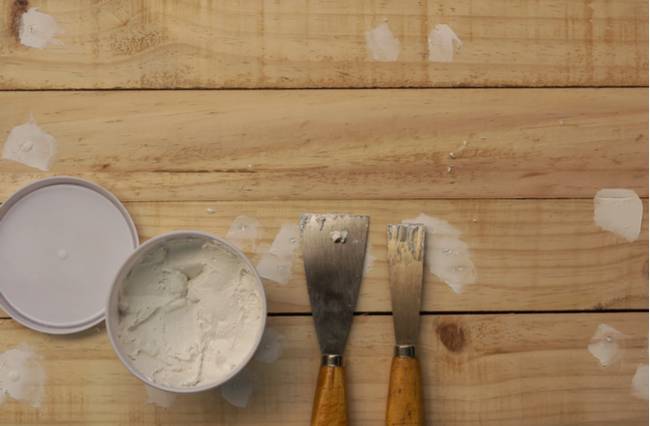
Delamination looks terrible, but fixing it is fairly easy, even if you’re not skilled at home improvement. Gather together the tools you need first, so you aren’t caught without an item you need. The project requires a putty knife, wood glue, a can of compressed air, and several clamps. Include an old rag to wipe away excess glue.
2. Clean Out the Top Layer
Using the tip of your putty knife, slide it beneath the delaminated layer. Slide it back and forth as far as it will go, but don’t force it. Spray the compressed air underneath the separated layer. You can blow yourself, but the can is less work. You just need to get rid of dirt particles and debris. Exercise caution during this part to avoid creating more damage or peeling back the wood any further.
3. Get Ready to Glue
Repairing delamination just requires a bit of glue, but you have to glue carefully. Avoid overspill, not only because it’s a sticky mess, but also because it mars the surface of your flooring. Hold the peeling layer open with the putty knife; then insert the very tip of your glue bottle and squeeze out a modest amount at first. Add more if necessary, but only after you spread around the glue with your knife. Cover as much of the exposed surface as possible. Repeat the process with every separation and every delaminated floorboard.
4. Secure the Repaired Boards
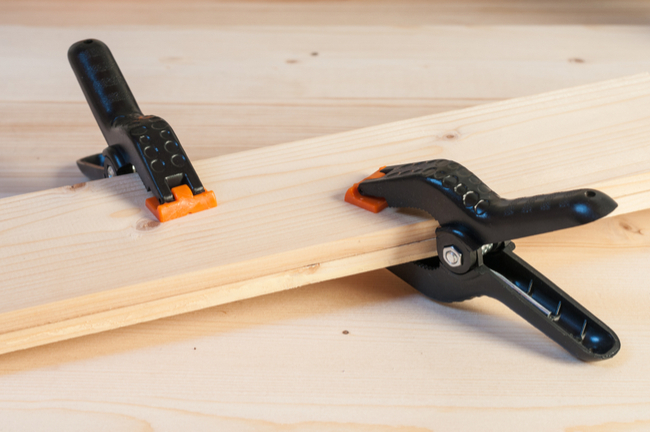
Wood glue needs time to dry. It also needs to remain undisturbed. The easiest way to guarantee that your fix sticks is to use clamps to hold the repaired layers together. You need as many clamps as you have separations. Peeling floorboards that curl may require spring-loaded clamps. Flat pieces of plywood fare well with bar clamps. Tighten each one until the glue begins to seep out from the cracks. That’s normal. It means the layers are securely held in place. Wipe away the glue. Let the floorboards rest that way for 24 hours.
At that point, you can remove the clamps. The flooring is ready for reinstallation, and it’s just as durable as ever. Follow the traditional installation method, taking care to leave space for the wood to swell in the heat and humidity. Traces of glue may remain on the surface of the floor. Don’t fret. Try cleaning it off with a safe soap on a barely damp cloth. If that doesn’t work, use a wood stain marker to color over the discolorations. Just make sure to match the color of your floor as closely as possible.
If only every flooring fix was so quickly and effortlessly accomplished. Bear in mind that you may need to change the way you clean your floors, and you might consider putting down area rugs in high-traffic areas, along with mats in front of every entrance into the house. Never let liquids stand on the floor, particularly sticky spills and animal accidents, as odors can seep into the floorboards as well.
Resources:
https://www.builddirect.com/blog/cleaning-laminate-floors/
https://learning-center.builddirect.com/flooring/wood-flooring-issues-faqs/
https://learning-center.builddirect.com/flooring/13-wood-flooring-issues-and-their-causes/
https://www.builddirect.com/blog/benefits-of-laminate-flooring/


kiran
Useful information. Thanks.