
How to Install Vinyl Flooring
|
|
Time to read 3 min
|
|
Time to read 3 min
You’ve picked a stunning vinyl floor for your home renovation and the material has arrived. Now it’s time for do-it-yourself installation. This part of the process can be challenging, but the work you put into installing your flooring will be worth it in the end – beautiful, durable and easy-to-maintain floors sure are a nice home feature. Of course, proper installation is necessary for achieving the outcome you want. With that in mind, check out these steps for installing your vinyl plank flooring.
Vinyl plank flooring requires careful preparation prior to installation. The product conforms to whatever is underneath it, so if you leave a protruding nail in your subfloor, the vinyl will form a bump over time. As such, you want to make sure the surface upon which you install your vinyl plank flooring is completely level and free of debris. Arrive at that clean slate by doing the following:
Replacing carpet with vinyl? Or what about tile? While some vinyl products allow you to place the material over old flooring, others require you to install it directly on top of the subfloor or underlayment. Because old floors can be uneven, placing vinyl on the underlayment is generally ideal. So, your first installation step is to remove old flooring. If you use a scraping tool to remove tiles, for instance, apply pressure horizontally rather than downward. That way, you’re less likely to dent your subfloor.
Because dust, debris and wood chips can cause bumps in vinyl plank flooring, you should thoroughly sweep before moving on to the next step. Use a broom first, then pull out a vacuum with a hose attachment to pick up the remaining particles. Avoid tracking new dust and dirt once you’ve cleaned the subfloor. In fact, if you’re doing the project over the course of several days, you may want to stop after leveling the subfloor, then start the next day by cleaning.
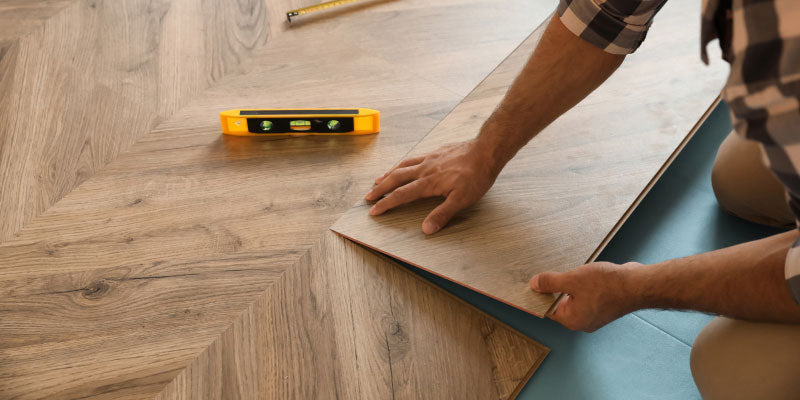
Take measurements of your room – you may have already done this when ordering your planks. Then, decide how you will lay out your tiles. You can stagger where breaks fall (kind of how bricks are stacked) if you want. In many cases, you may need to cut some of the boards to fit into the room. Per the old adage, you should measure twice (or more) and cut once. You may want to leave the cutting for later in the installation process – that way, you can see exactly where pieces will fit. To cut the boards, score a line on either side using a box cutter, then fold the pieces and pull them apart.
The vinyl plank flooring boards should lay parallel to the longest run of the room. For instance, if the space is 5-feet-by-8-feet, the boards should run along the 8-foot wall. This layout will look best. Start on the left side of the room and work right.
Many vinyl products have adhesive on the back already, saving you from having to place it on your floor first. Peel the coating away from the boards, revealing the sticky side. When you install the boards, place the back end against your starting wall. You should bend the board as you place it down so the end you’re installing is against the floor while the part yet to be placed is in the air. Roll the board down and onto the floor. This technique prevents the formation of air pockets and gives you an even final product. Use your hand to press the boards to the ground.
Most vinyl plank flooring boards have a lip that juts out. Place each successive board on top of that lip so the flooring fits together like a puzzle. Remember to stagger board lengths when you install vinyl flooring.
After your floor is set (you’ve cut pieces to fit in the remaining spots and each board is in place), you can return door jams and molding to their original places. Doing this last gives the room a finished look.


