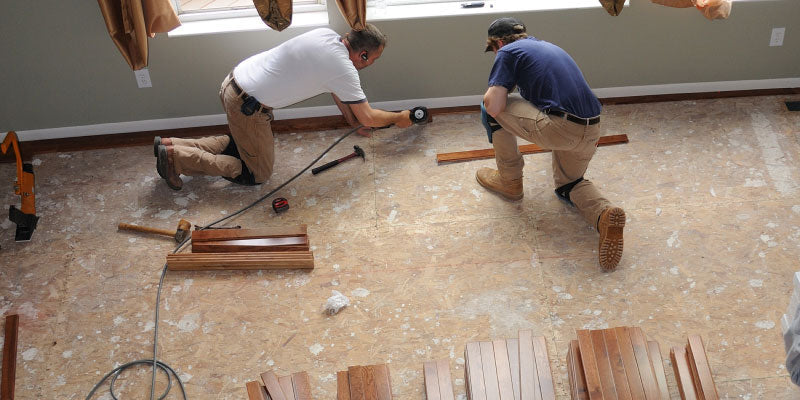
How to Prepare a Wood Sub-Floor
|
|
Time to read 3 min
|
|
Time to read 3 min
Wood sub-floors are a better surface for installation of wood flooring, and the only acceptable choice for a thick solid wood. Preparation of the sub-floor is crucial to successful installation; the foundation must be solid. There are three main areas of concern: structural integrity, a clean, flat and even surface, and moisture content. Here’s what you need to know to prepare a wood sub-floor to make sure it is problem-free and has a long and beautiful life.
The quality of your floor depends a great deal on the integrity of your sub-floor. After the floor is swept, do a visual check of the surface. Countersink any nail or screw heads. If a screw or nail cannot be leveled and countersunk, replace it.
Walk the floor. Listen for squeaks and feel for areas that are spongy or feel hollow. This may indicate a weak spot in the concrete underneath, which should be addresses before proceeding. Screw or nail down any loose boards. Wood sub-floors should be screwed to the underlying floor joists at 6-inch intervals.
Note: The typical recommended thickness of the sub-floor is ¾”. Check the manufacturer recommendations and make sure that your sub-floor meets all requirements for thickness and width.
If there is a great deal of damage to the floor or it does not meet the manufacturer standards, it’s probably best to call in a professional contractor and replace the entire sub-floor.
The word “level” often comes up when discussing flooring, but it’s not entirely correct, because no level measures an 8 – 10 foot span. Specifications define that sub-floors should be within a tolerance of 3/16 of an inch over a span of 8 to 10 feet. This means that when you prepare a wood sub-floor that is within any 8 –10 foot range, there should be no dips or humps that exceed 3/16 of an inch. To find uneven spots, lay out a flat 8 – 10 foot plank and mark trouble spots as you move it across the floor in all directions.
Minor hump problems can be (carefully) sanded down with a hand-held or rented orbital sander. Sanding throws up a lot of dust, so be sure to wear protective goggles and a dust mask.
Fill dips, low spots and gouges with a cementitious leveling compound, which may also be called floor patch. This is fairly simple; you mix it according to manufacturer instructions and patch the floor. When mixing the patch compound, add the water first and then the dry mix so you don’t get a thick clump in the bottom. Mixed floor patch should be about the consistency of pancake batter.
To apply floor patch evenly, take the board you’re using as a straight edge and pour the amount of patch you think it will take to fill the gap, then pull the board back and forth over the area to spread the patch. One person should be on each end of the board to apply equal pressure. It may not look perfect, but as long as it’s even it should be fine. This is called screeding. Once the gaps are filled, let the screed dry completely. Then check that it’s flat, and sand if necessary.
Note: If you’re going to be nailing or stapling the wood flooring, do not use large areas of floor patch. It will crack.
Most wood sub-floors are installed over concrete slabs. Concrete is a porous material that pulls moisture from the air and ground. This is the reason that solid wood floors should not be installed at or below grade, or sea level. There is always moisture in the air, but too much will soak into wood planks like water into a sponge, causing them to swell. This is normal, but too much moisture causes the boards to push beyond the small area allocated for movement, and the floor becomes pressurized as the boards crowd the space. Eventually, floorboards with too much moisture have nowhere to go but up, resulting in buckling and warping, which may be localized to a small area or ruin the entire surface of the floor.
Use a moisture test kit to be sure that both the concrete and the wood sub-floor meet the recommended moisture content specified by the manufacturer, usually no more than 4%. This is a very important step and should not be skipped when you prepare a wood sub-floor.
Unless you are in an area of very low humidity, we recommend an underlayment with a moisture barrier, or 2-in-1 underlayment. Underlayment comes in rolls. Typically, you would roll out strips of underlayment to cover the entire floor and then join the edges of each row with a special tape. Check the manufacturer instructions for specifics. Ends can be left long and trimmed after the flooring is installed.
Once the preparations are done, you should clean the floor thoroughly, removing spatters of compound, dust, nails, or anything else that may cause problems under the floorboards. Wood flooring should be considered an investment. It improves the value of your home, and with proper care, can lend beauty and elegance for decades to come.